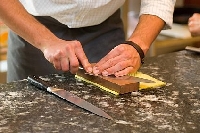
How to sharpen a knife
By Catalogs Editorial Staff

Techniques for identifying a dull blade and sharpening a knife
“always keep an edge on yr knife, son, always keep an edge on yr knife
cuz a good sharp edge is a man’s best hedge against the vague uncertainties of life
yes, a good sharp edge is a man?s best hedge against the uncertain vagaries of life
but i never could sharpen no knife, like the one who gave the advice
and I never could sharpen no blade, quite the way he sayed.“
– From “Always keep an edge on yr knife” by Corb Lund
Country singer Corb Lund dedicated a song to the importance of sharpening a knife. And, every good cook knows the value of keeping a sharp edge on a knife. If a knife has nicks, burrs or becomes dull, this can severely impact its cutting ability. However, sharpening a knife is an art form that takes practice and focus.
If you are interested in learning how to sharpen a knife, here are some helpful tips.
The most important part of learning how to sharpen a knife is learning to recognize a dull edge, and see the nicks and burrs. To identify a dull edge, hold the blade in front of you with the edge directly in line with a bright light or lamp.Tilt the blade side to side and back and forth. Nicks and burrs will glint, because light will be reflected by their uneven surfaces.
Another effective technique for establishing whether a knife has a sharp edge includes cutting through a sheet of paper – if the knife cuts smoothly it is adequately sharp, if it catches or tears the paper, the blade is worn. Some chefs even recommend testing the blade of knife gently against your thumb, or even pressing the blade of a knife gently into your fingernail. If the blade leaves a thin, clean slice in a fingernail, you can be sure it is sharp.
Remember that handling, and in particular, testing the sharpness of a knife blade is dangerous. Stay focused and use common sense to avoid any cuts or injuries. The same goes for sharpening a knife – take the time, effort and patience to learn how to sharpen a knife properly so that mistakes will not occur.
~
If you don’t know how to sharpen a knife, it’s wise to begin by asking the knife manufacturer, or by reading any material that came with your knife. You must determine the proper angle to put on the knife blade. If you can’t obtain this information, evaluate your uses for the particular knife and make your best estimate, selecting an angle between 10 degrees and 30 degrees for each side of the blade. Shallower angles have a sharper edge, but they are less likely to hold that edge for as long a period as steep angles, which are more durable.
If you are having trouble holding the knife to control a precise angle, you may wish to invest in an angle guide. Angle guides will help to maintain a precise and consistent angle as you sharpen a blade against a stone, and are advisable for beginner sharpeners.
In order to sharpen a flat blade, invest in a sharpening stone, a leather strap and some honing oil. If you don’t have oil, water will also do the trick to lubricate a sharpening stone.
The fundamentals of sharpening a knife involve grinding one edge of a knife at a time against a sharpening stone, using a consistent, sweeping motion and even pressure to sharpen the blade’s entire length. Once the first edge has acquired a burr, you can switch to sharpening the other side of the blade.
A burr, also referred to as a wire edge, is the thinnest edge of the steel on the cutting blade. As you sharpen a blade, the presence of a burr means that the bevel of the steel has been ground finely enough that it is beginning to curl over. Gently feel for a burr with your thumb or tip of your fingernail. Once you have achieved a burr, you can flip over the knife and repeat the sharpening procedure on the opposite side.
Many knives or sharpening accessories come with instructions that offer guidance such as “sharpen the knife with 30 strokes on one side, then 30 strokes on the other.” These instructions may or may not be accurate. For best results, only sharpen a knife until a burr is formed.
Once a burr has been formed, it is time to progress to finer stones that will further smooth the blade edge. Much like grades of sand paper, sharpening stones are available in a variety of different grits such as a medium (300-400 grit) stone, a fine (600 grit) stone, and even an extra fine (1,200 grit) stone. For a beautifully polished edge, try giving your blade a quick stropping on leather.
Serrated knife blades require a different sharpening process, and different type of sharpening tools. Sharpening stones can not be used on serrated knives. Instead, research how to sharpen a knife with a special cone or rod-shaped taper ideal for serrations. Some of these sharpening cones and rods feature diamond layers, ideal for getting inside of each serration to sharpen them individually.
Learning how to sharpen a knife takes time, patience and practice, but it will ultimately enhance your culinary adventures. Prior to shopping for a sharpening system, familiarize yourself with your particular set of knives, and read up on any material from the manufacturer.
References:
Knife Sharpening Made Easy
Video: Knife Sharpening for Chefs
Popular Savings Offers


