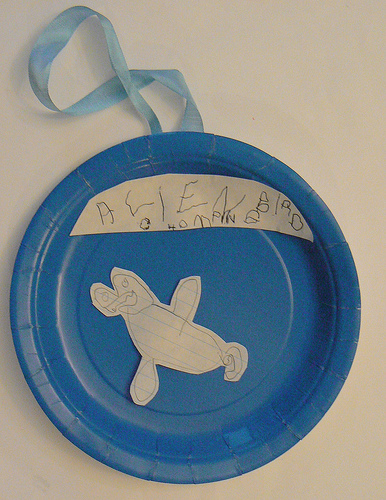
How to make paper plate crafts
By Catalogs Editorial Staff

Make paper plate crafts to stir kids’ imaginations with sewing basket treasures
Paper plate crafts are fun projects for kids to make, especially when they’re encouraged to make something extra special. Sewing baskets are full of treasures that can turn a flat drawing into a lively field of flowers; from scraps of lace to tiny trinkets, share a few sewing basket treasures with your kids and watch their eyes light up at the possibilities.
Offering a few sewing basket treasures to your kids’ crafty hands doesn’t mean you have to part with the item permanently. Paper plate crafts have a short lifespan. Let your kid know they can borrow the items.
Many crafters have a stash of treasures in their sewing baskets, items they acquired not for a specific purpose, but because they found it beautiful, rare, strange or simply knew they wanted to do something with it someday. If you recall the story behind the item, share it with your child so she understands the item is special to you.
~
Paper Plate Craft Ideas
If kids seem stuck for ideas, here are a few suggestions for paper plate crafts that can incorporate a special ribbon, vintage buttons or other sewing basket treasure.
Bear with Flowers
This is a paper plate craft of a polar bear holding a bouquet of flowers. You can adapt this craft to a number of different animals. Polar bears are an easy start because they’re white so the flower colors and eyes will really pop.
Materials
1 paper plate, 1 mini paper plate, white construction paper, pencil, black marker, pink crayon or paper, colorful tissue paper (red, yellow, orange, purple), scissors and glue
Sewing basket materials:
two matching buttons, flower cutout from an old postcard
Directions
1. The larger paper plate is your polar bear’s body and the small paper plat is the bear’s head. Lay the ‘body’ face down on a flat surface and place the ‘head’ face down above the body. Glue the head to the body where the two overlap.
2. With a pencil, draw two curved arms for the polar bear with rounded paws (the flowers will lay in the polar bears arms). Trace the pencil with a thick black marker and cut out the arms. Do the same for two small round circles that will be the polar bear’s ears, and two legs with paws.
3. Position the arms across the polar bears body so they begin at the ‘shoulders’ and meet below the head at the center of the body (the paws should slightly touch). Glue the ears and legs by to the back. Color in a small pink circle on both ears. Draw a nose and mouth at the center of the small plate.
4. Glue the buttons on for eyes (you can sew them on if you don’t want the buttons to get glue on them).
5. Bunch up small pieces of colorful tissue paper. Glue the flowers to a square piece of darker tissue paper and glue the bunch to the top of the polar bear’s arm. Draw a green stem from the flowers to the top of the arms, and continue the stem for inch beneath the arm.
You have your own polar bear offering a bouquet of wild flowers, and he has the most remarkable eyes!
Paper Plate Coiled Snake
Materials
1 paper plate, pencil, scissors, crayons or water colors, glue, short string
Sewing basket materials
beads, small bell
1. Color both sides of the paper plate one solid color. Beginning at the outer edge, cut the plate in a spiral. Stop cutting when you’re about 4 inches from the plate’s center (the snake’s head). Draw two eyes at the center.
2. Beginning at the head, draw a light line across the body every three inches until you reach the tail. Make each section a different design. Glue beads on a section or two for polka dots. Thread the string through the bell and glue the string to the tail. Attach a piece of red ribbon beneath the eyes for the tongue.
UFO
For a project that’s out of this world, try this paper plate UFO ship from Kids Craft Weekly. Add a few buttons or beads for decoration, or place a little trinket inside the plastic dome lid to play the role of Alien.
Hanging Wall Pocket
Enchanted Learning offers this hanging wall pocket craft. Tie a ribbon to the top for hanging.
Bumble Bee
DLTK Teach offers a bumble bee plate craft. Consider using scraps of sheer fabric like tulle for the wings. Glue thin wire to the bottom to shape and support the wings.
Crafts provide a fun, creative way for kids to learn. Sharing a few of your sewing basket treasures can open up a whole new world of materials and patterns to inspire their imaginations.
References:
DLTK Holidays
Talking Child: Plate Crafts
Kids Craft Weekly
Popular Savings Offers


