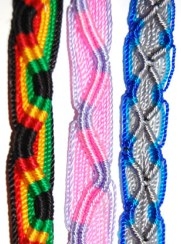
How to make friendship bracelets
By Catalogs Editorial Staff

With a little practice you can easily learn to make friendship bracelets.
The weaving patterns often associated with friendship bracelets are thought to have derived from ancient Native American crafts. The tradition goes something like this: The person who receives the friendship bracelet has to wear it until it naturally falls off. If he or she removes it prematurely, it means the friendship is over.
The types of friendship bracelets out there are as varied as the people who give and receive them. There are hemp bracelets, beaded bracelets and basic string (or floss) bracelets.
Bracelet patterns run the gamet from Broken Ladder and Chevron to Chinese Staircase and Totem Pole.
If you are going to try your hand at making friendship bracelets, it is essential that you learn how to create the basic knot. To do this you need two strings (of whatever material you plan to use). You can buy the string at any craft store.
Hold the strings parallel to each other. Place string No. 1 over, under and then through string No. 2. While holding string No. 2 firmly, pull up on string No. 1 until the knot is snug. It is important to do this twice in a row, otherwise you are only creating a half-knot.
Once you have the knot down (it takes some practice!), you can go on to more advanced patterns for your friendship bracelet.
How to make friendship bracelets using floss:
The embroidered floss bracelet is probably the most popular style of friendship bracelet, and it is not difficult to master once you get started.
You will need four different colors of embroidery floss – about 25 inches in length – and masking tape.
~
1. To start, tie your knot about an inch or so from the top. Then, tape the knotted end to a table or other hard surface, separating the strands of thread.
2. Next, loop string 1 over and then under string 2, making sure string 2 is straight. Pull until snug.
3. Repeat step No. 1.
4. Using string 1, make double knots around strings 3 and 4.
5. Next, take string 2 and do the same thing, making double knots around strings 3, 4 and 1.
6. Continue this pattern until the bracelet is to the desired length. Once there, gather the strings and tie them into a knot. Trim the ends of the bracelet.
How to make friendship bracelets using hemp:
Hemp is also a popular material used for friendship bracelets. Remember the hemp bracelets you used to get at the beach every summer? Here’s how to make your own.
You will need to buy some hemp twine at your local craft store (about six yards should do) and masking tape.
1. Cut a strand of the hemp to about six times the actual length of the bracelet.
2. Take a second strand of the hemp and cut it about twice the length of the first.
3. Fold the strands in the middle, fashioning a crease at the midpoints.
4. Tie the midpoints together in a knot, leaving at least a 1/2-inch loop at the end.
5. Use a safety pin to fasten the looped end to the carpet or a piece of furniture.
6. Now you have four strands of hemp to work with. Make sure the two shortest strands are together in the middle with the longer strands on the outside.
7. Time to create a figure 4. You will get to know this maneuver very well by the time you finish. Using the right outer strand, pull to about 45 degrees away from the middle strands. Then place it over the two middle strands and under the left outer strand.
8. From here, guide the left strand under the middle strands and then up through the middle of the number 4.
9. Pull both the right and left strands to secure.
10. Repeat step No. 7 on the opposite side. Continue to do this until you reach the desired length of the bracelet.
11. Tie the four strands together at the end into a knot and voila!
Popular Savings Offers


