

Install a custom mailbox and add some curb appeal.
When you decide to make improvements to your home, it is typical to think of the things you can do to the interior of your house to make it more up-to-date and homey. The exterior of your home is another area in which a little improvement and cosmetic work goes a long way. Installing a custom mailbox can increase the curb appeal and exterior beauty of your home.
Select your mailbox
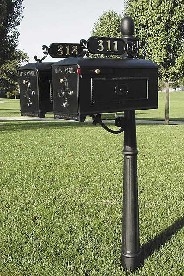
There are many companies that sell custom residential mailboxes, and you can find one that fits the style of your home as well as your individual personality. From typical mailboxes painted with cartoon characters to classy post-mounted boxes in the shape of treasure chests or antique-looking cast aluminum boxes, you can find mailboxes in almost any style you can imagine.
Gather necessary supplies
Once you have your mailbox, make sure you have the rest of the tools and materials you need for installation: a post (if your mailbox did not come with one), a shovel, wheelbarrow, quick-drying concrete, soil, and an assistant.
Mounting location
Before you begin to install your custom mailbox, contact your local post office. Ask about the regulations for installing mailboxes, including the height and distance from the curb.
Dig a hole
Once you know where to place your mailbox, you will need to dig a hole. Dig a hole about 2 ® feet deep and twice as wide as our mailbox post’s diameter. Fill the bottom six inches of the hole with gravel for drainage.
~
Prepare quick-drying concrete
You will need to use some quick-drying concrete to secure your mailbox post in place. Follow the package directions, and be sure to wear gloves, as the concrete can irritate your skin.
Place the post in the hole
This step is where the assistant comes in. Place the pole in the hole and center it. Have your assistant hold the pole steady while you pour the concrete in around the post to about three inches from the top of your hole.
Cover concrete
Once the concrete has dried, fill in the rest of the hole with the soil to camouflage the concrete. This is an optional step ? if you don’t mind the look of the concrete, you can fill the hole to the top and skip the soil.
Mount your custom mailbox
Allow the concrete to set overnight before you mount the mailbox to the post. Follow the mounting directions included with your mailbox. Most boxes come with mounting brackets; if yours didn’t, you can use mounting brackets purchased at your local hardware store.
Installing a custom designed mailbox is a good way to add some curb appeal and individuality to your home.