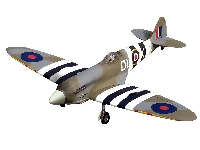
How to create your own decals for modeling
By Catalogs Editorial Staff

Tips to create your own decals for modeling and decorating your models
Many hobbyists look at the decals available in stores and naturally want to add their own touches. The next step is to wonder how to create your own decals for modeling. The answer is relatively simple. This is not a difficult project, there’s just not as much information on this aspect.
The first thing to do is set expectations for DIY model decals compared to mass produced ones. The later are usually printed in a variety of water-based colors with metallic finishes. These require a sealant, usually a clear screen pad, to protect the design.
Make design adjustments
Beginners are typically working with inkjet printers. Many of these don’t print white or metallics unless they’re the much more expensive models. If you’re using a standard printer, avoid designing with metallics. To create decals with white in them, incorporate the white of the paper you’re printing on into the design.
Color laser printers are expensive, but if you have access to one you can print designs straight onto decal paper. To save ink, you can also print your designs on regular paper and use a color laser copier to transfer them to decal film.
~
What you need
To create your own decals for modeling, you need the right printer. A standard custom decal printer, sometimes referred to as dry printing series, will get you started. You’ll also need decal paper and drawing or photo-editing computer software.
A scanner is extremely useful for, well, scanning reference materials for designing. A basic model will do, no need for high resolution here.
You’ll also need liquid decal film if you’re using a custom printer as this ink is not waterproof. All you need to apply the film is a basic foam brush. This film isn’t necessary if you have a printer that uses waterproof ink.
Design tips
Before rolling up your sleeves, remember to maximize every inch of design space on these expensive papers. Adjust placement as needed in order to fit multiple designs and sizes on each sheet.
While you’re free to design entirely from your imagination, many people use existing art, like old logos, and modify them to fit their model building projects. The photo-editing program will allow you to isolate the material you want to work with and make changes. Working from original logos and other material gives decals an authentic look.
Many model trains, military planes and ships will have a variety of old logos and designs to choose from. Some are included in the kits they come with and most are online with some light research.
Printing
Once the design is finished, you may feel excited to print and apply. If you’re not using a laser printer or copier, the printing process involves more than hitting one button. This is where you should follow the instructions on your printer exactly.
Designs with many colors are sometimes printed in layers. Load the cartiridges that correspond with your design. If any colors are left out due to the limited number of cartridge spots, you’ll need to run the paper through again, removing the other cartridges and printing only the unprinted layers ? this only takes a few extra minutes.
If you want to add a glossy finish, add in a cartridge labeled Finish and another layer in the file for this decal. Before printing, click OVERLAY in the settings. Note that printing with a finish is a slow process so best done when you’re only making a few decals at a time.
Popular Savings Offers


