Advanced scrapbooking techniques
By Catalogs Editorial Staff

Use advanced scrapbooking techniques for something different on your pages
A bit of paper, some glue and great photographs are the basic ingredients of scrapbooking, but have you ever tried expanding your creative horizons? Advanced scrapbooking techniques can make your albums look like a professional crafted them for you. Some of these artists charge upward of $20 per page!
Here are a few ways to make your pages into eye-popping creations.
Emboss foil
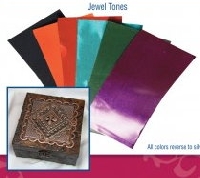
Embossed foil elements using products such as Precious Metals Spellbinder’s Craft Foil are not as difficult to produce as they look.
Find an image you like, preferably with simple lines or choose lines that make the image work for you. Make sure the image is small enough to be place onto a scrapbook page. Adhere the image to the craft foil and place all of that on a soft surface such as a mouse pad. With a stylus or ballpoint pen, draw the outline of the image right on the image. This will transfer the image to the foil.
Carefully cut the image out of the foil. You can leave it as is or fill the indented side with white glue or even a mixture of white glue, plaster of Paris and a little water. Let it all dry and the embossed image will be preserved.
When your element is completed, adhere it to your scrapbook page with a strong adhesive such as craft-sized Glue Dots. Cut them to size very carefully or use one per element.
~
Shrink charms
Plastic food containers turned into shrink plastic? Yes!
This is a great way to recycle using something you probably bring back from the salad bar or the deli and add to your box of advanced scrapbooking techniques. Use plastic food containers to create charms that you then adhere or clip to your pages.
Simply cut out a larger-than-needed piece of plastic and decorate it with permanent markers. If you want to hang the charm, punch a hole at the top with a standard hole punch. When completely dry, bake on parchment paper placed on a cookie sheet for a few minutes in a 250 degree oven. The shrink process is complete when the piece stops twisting and settles down to a flat charm.
Thank you to ReFab Diaries for these cool directions.
Hot glue elements
I fell in love with this technique when I first saw it. After all, it is the simplest thing to do.
Look for glue gun refills in different colors or even the sparkly glue. Spray some cooking oil on a sheet of standard aluminum foil and squirt a big blob of glue on the foil. Quickly press an oil-treated stamp or wax seal embosser (used for sealing letters) into the glue. Make sure you spray it first with cooking oil so it doesn?t retain the hot glue. Hold for just a second and remove the stamp or seal. It sets and cools quickly. Remove the resulting element and adhere it to your page using a strong adhesive.
Anything unusual can be an advanced technique. Try everything and anything on your scrapbook pages. Create a scene using rub-ons or add color to an existing photograph or printed image. Alcohol inks or even permanent markers work well to add color.
Learn a few of these varied scrapbooking techniques and you could turn your pages into treasures that look as if an artist created them.
Popular Savings Offers


